| Line 76: | Line 76: | ||
| − | ==== Save / | + | ==== Save / preview / reset ==== |
* Save: it means saving the configured content to the database and generating HTML. | * Save: it means saving the configured content to the database and generating HTML. | ||
| − | * | + | * preview: it generates temporary HTML to display the configured content in a new tab. Changes must be saved by clicking the "Save" button to be retained. |
* Reset: it restores all content to its initial state. | * Reset: it restores all content to its initial state. | ||
Revision as of 17:38, 8 November 2023
RADIUS> Settings> Captive portal
We provide pages for wireless LAN usage guide, user sign-up, and changing user passwords using Captive Portal functionality, and administrators can directly edit these pages
Pages
- Guide: This is a page for wireless LAN usage instructions and guidance.
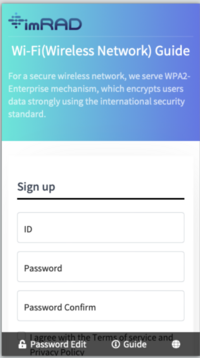
- User Sign-up: This is a page where wireless LAN users can register their username and password, and if you do not wish to use it, they can simply deselect it.
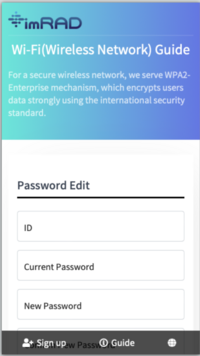
- Password Edit: This is a page where users can edit their password after it has been reset, and if you do not wish to use it, they can simply deselect it.
Web server
You can specify the protocol and port for the URL to access through the captive portal. If you choose the HTTPS protocol, the user's browser may encounter a self-signed certificate connection error. Therefore, we recommend using HTTP. Even when using HTTP, the password generated during user registration is securely encrypted and sent to the server.
Sign-Up Approval
You can choose whether users will be automatically approved once they register or if an administrator will need to approve them(Manual). User accounts must be approved after registration for wireless authentication to be allowed.
The expiration represents the expiration period of approved user accounts, and the expiration time is set based on the time of application.
Color/Image
You can change the overall color scheme and the image in the top-left corner of the page. To set the color scheme, simply click on 'Details'.
| Name | Description |
|---|---|
| main-bg-primary | Primary background color |
| main-bg-seondary | Secondary background color |
| main-h1-color | Title 1 color |
| main-h2-color | Title 2 color |
| btn-bg-primary | Button background color |
| btn-bg-active | Active button background color |
| btn-color | Button text color |
| btn-color-active | Active button color |
| formBox-color | frame box text color |
| formBox-bg-color | frame box background color |
| formBox-border-color | frame box border color |
Display Language
We provide Korean and English (additional languages require separate customization).
| Name | Description |
|---|---|
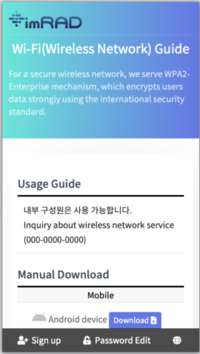
| Title | This title appears at the top of the page and corresponds to the 'Wi-Fi(Wireless Newtwork) Guide' seen in the image. This title is displayed identically on the guide, user sign-up, and password edit pages. |
| Body | It represents the description below the title and corresponds to 'For a secure wireless...' seen in the image. This description is displayed identically on th guide, user registration, and password change pages. |
| Guide message | You can specify the content the 'Usage Guide' on the guide page. The content can be written using HTML tags. |
| Success message | This is the content displayed when 'User Registration' is successfully completed. |
| Failure message | This is the content displayed when an issue occurs after 'User Registration'. |
| User Information | These are the details to be collected during 'User Registration.' User ID, password, and password confirmation are mandatory information, and you can optionally configure to collect additional user personal information.
Any additional user personal information should be set the same as Custom Fields for the correct display of registered user information. |
Save / preview / reset
- Save: it means saving the configured content to the database and generating HTML.
- preview: it generates temporary HTML to display the configured content in a new tab. Changes must be saved by clicking the "Save" button to be retained.
- Reset: it restores all content to its initial state.
Captive Portal setting
To set the Captive Portal page of this system on a wireless LAN controller, you should specify it as follows:
{protocol}://a.b.c.d:{port}/
If {protocol} is HTTP and {port} is 80, then specify it as follows:
http://a.b.c.d/
To use the Sign-up page as the default, set it to http://a.b.c.d/?2, and to use the password edit page as the default, set it to http://a.b.c.d/?4.


